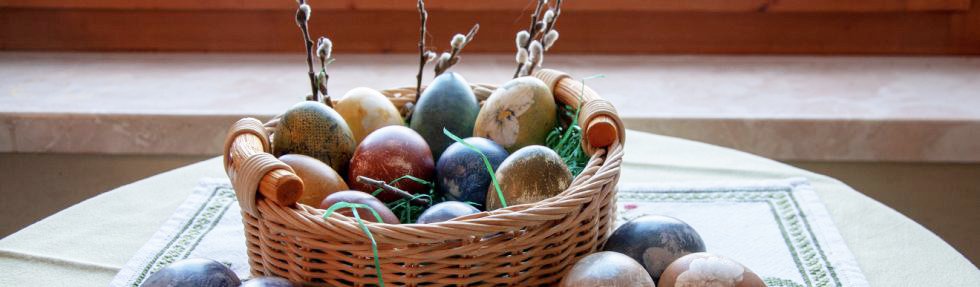
Reaching for Easter eggs on the supermarket shelf may be the more convenient solution, but certainly not the more fun one. Especially when the Easter eggs are dyed with all-natural ingredients – just like in grandma’s days.
Colorful eggs belong to Easter in Kitzbühel like the Christmas tree to Christmas. But how did this common tradition actually come about? “Since ever, eggs have been considered a symbol of fertility, and even in ancient Greece they were dyed red,” explains Hilde Flack, an expert on Easter tradtions and natural dyeing. “In the past, the fasting period until Easter was observed much more strictly and eggs were avoided,” continues the tradition-conscious Hilde Flack.
During this time, of course, the chickens were not distracted from their daily “work” and so accumulated a lot of eggs. If the eggs were initially given to the feudal lords or the needy, the tradition of giving away decorated or colorful eggs developed around the 16th century. Colours supplied by nature were used at that time. Hilde Flack has revealed to us how Easter eggs can still be designed naturally today with ingredients from Kitzbühel farmers.
Free range eggs and lots of vegetables
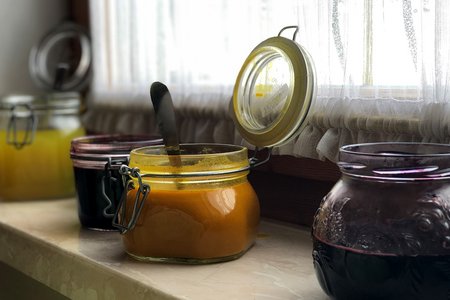
“Eggs from free-range chickens are best because the shell is much stronger than those from battery hens,” explains the Kitzbühel local. White eggs form an ideal basis for the colour, but brown eggs can also lead to fancy results. The very first thing to do is to boil them and rinse them with vinegar water. Then it’s on to the colours. “Everyone actually has their own ideas there,” laughs Hilde Flack. The best-known type is the one with red or yellow onion skins. When processing, they should be as fresh as possible. “Red beets also give a nice red tone. Spinach leaves or parsley are taken for green, and blueberries are great for making blue dye,” Hilde Flack said. Turmeric, saffron (both yellow), mate tea (green) or coffee (brown) are also ideal as natural colouring elements.
And it becomes colourful
No matter which and how many colours it will be, the production process is very simple: Crush the individual ingredients (not necessary for tea or powder), put them in plenty of water and boil for a good 30 minutes. Then let the broth cool and strain or squeeze through a straining cloth so that no residue remains in the liquid. It is best to put the final product in a resealable container, because it will keep for a good week.
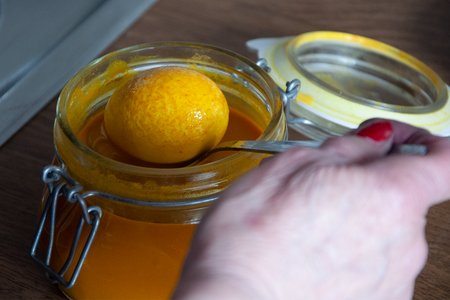
The dyeing can now begin. “I always pour hot water over the boiled eggs again, then the shell absorbs the color better,” noted Hilde Flack, “and then they’re just completely submerged in the color.” After a few minutes, use a spoon to carefully turn the egg over so it colours evenly and give it another five minutes or so. The longer it bathes, the more intense the result – there’s no such thing as too long here. “Of course, the colors will not be as squeaky colorful as those from the supermarket. It can also be that two eggs end up looking completely different, even though they have been bathed in the same colour. That’s just nature,” the Easter insider is pleased about her experience.
Bacon and flowers as little helpers
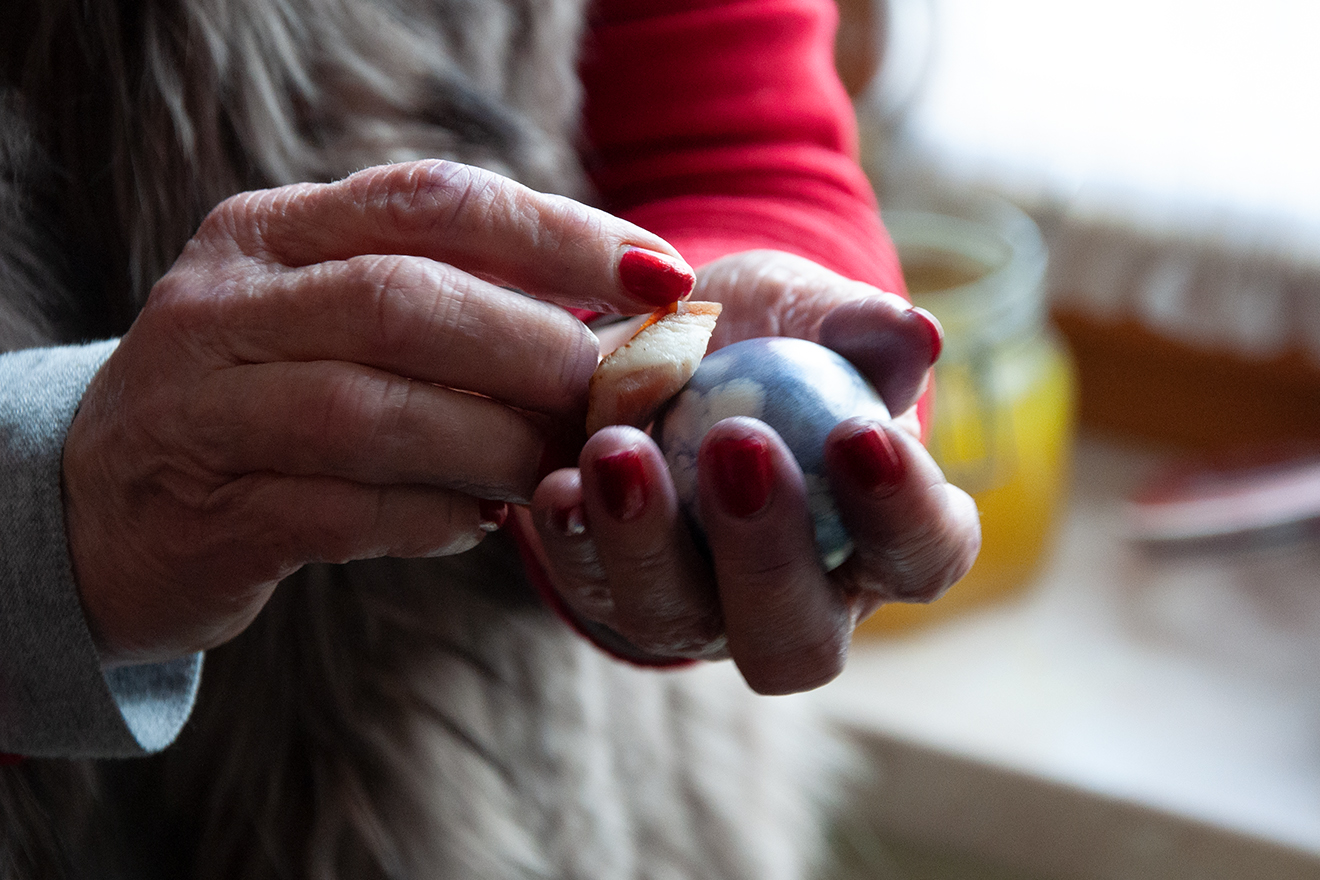
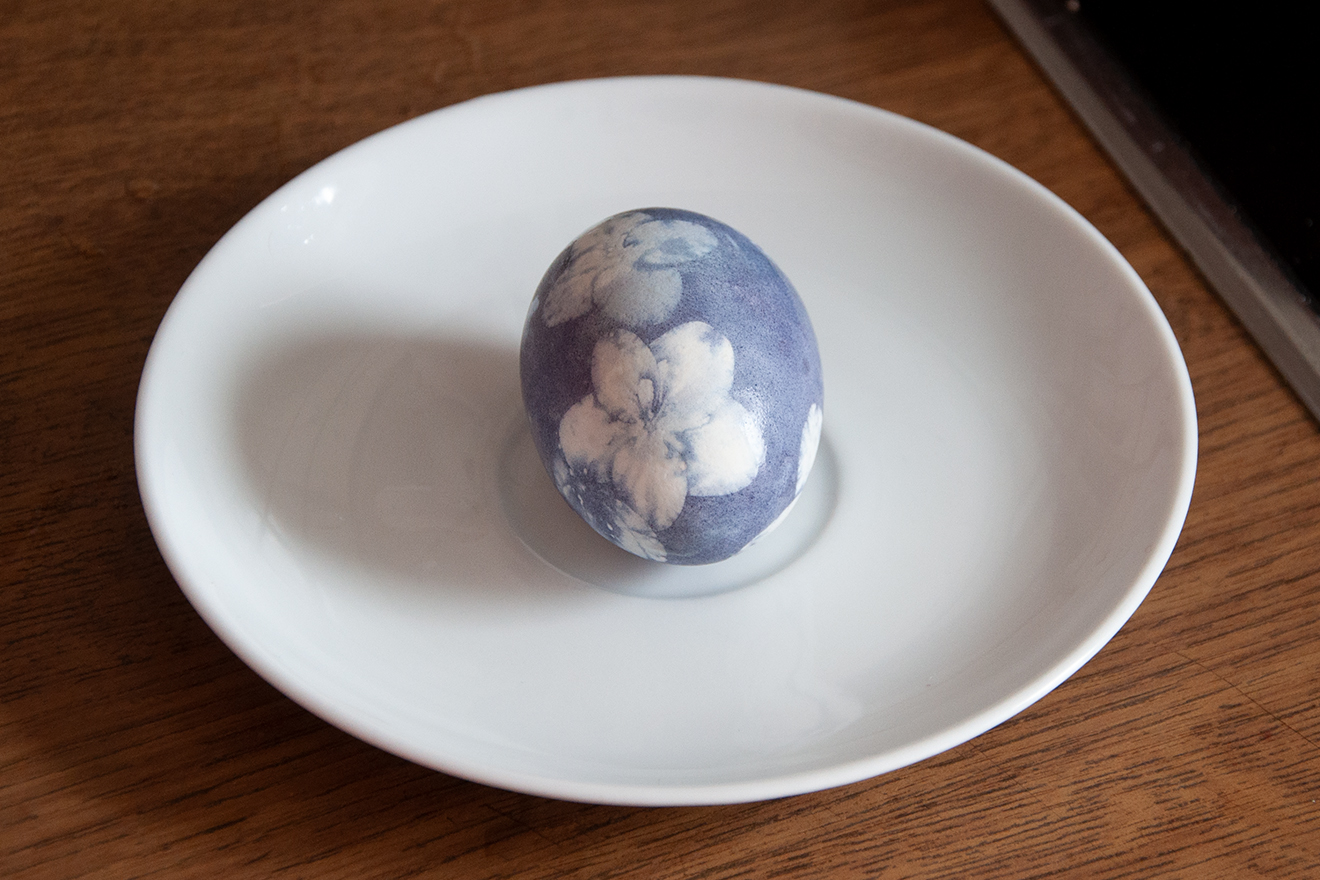
After the egg is briefly rinsed with water, the new colour appears: pastel pink, light yellow, a soft green or dove blue, all from natural sources. Once the egg is dry (dab carefully with a paper towel), it has to be rubbed with a bacon rind. The fat not only adds shine, but also seals the pores so the egg lasts longer.
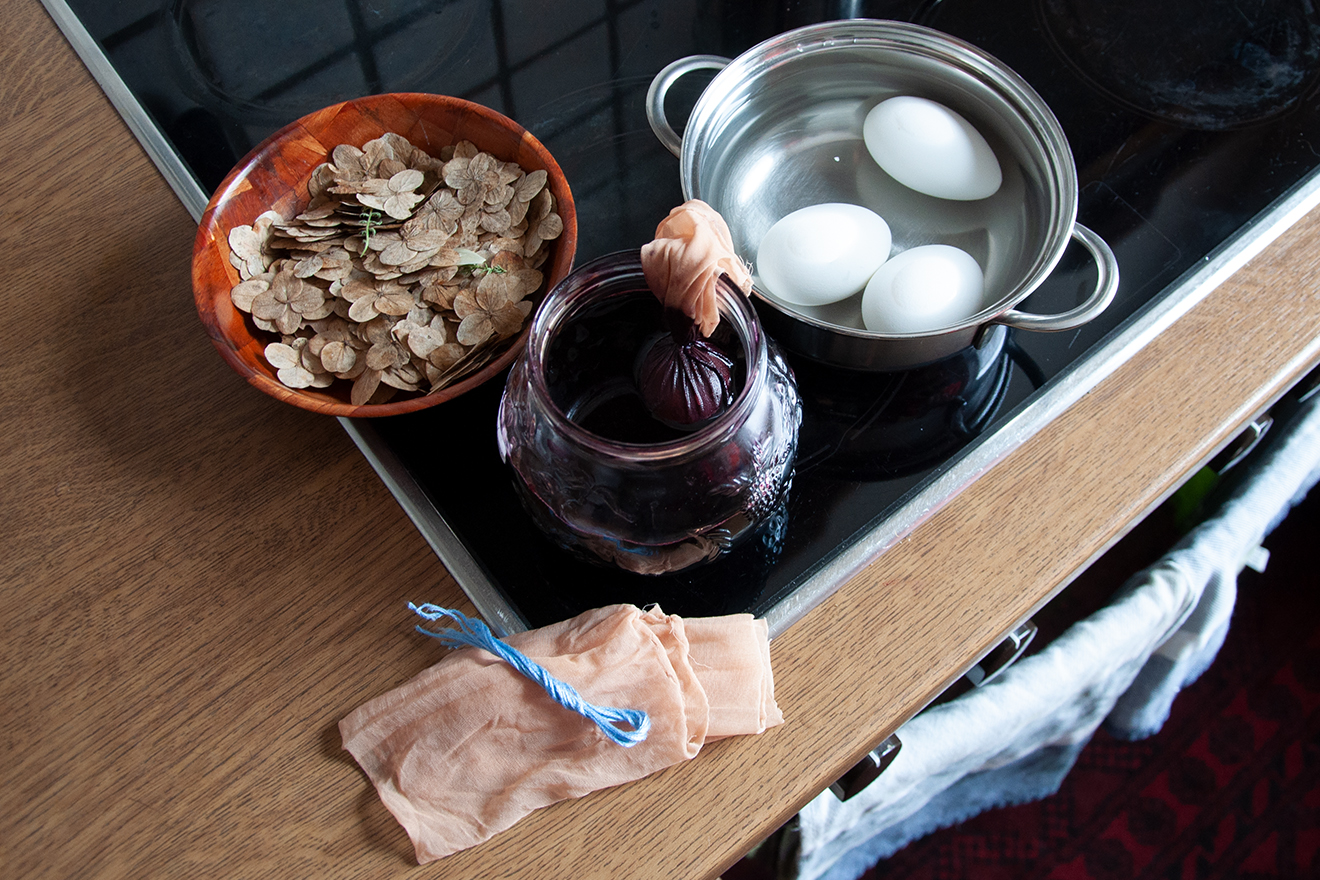
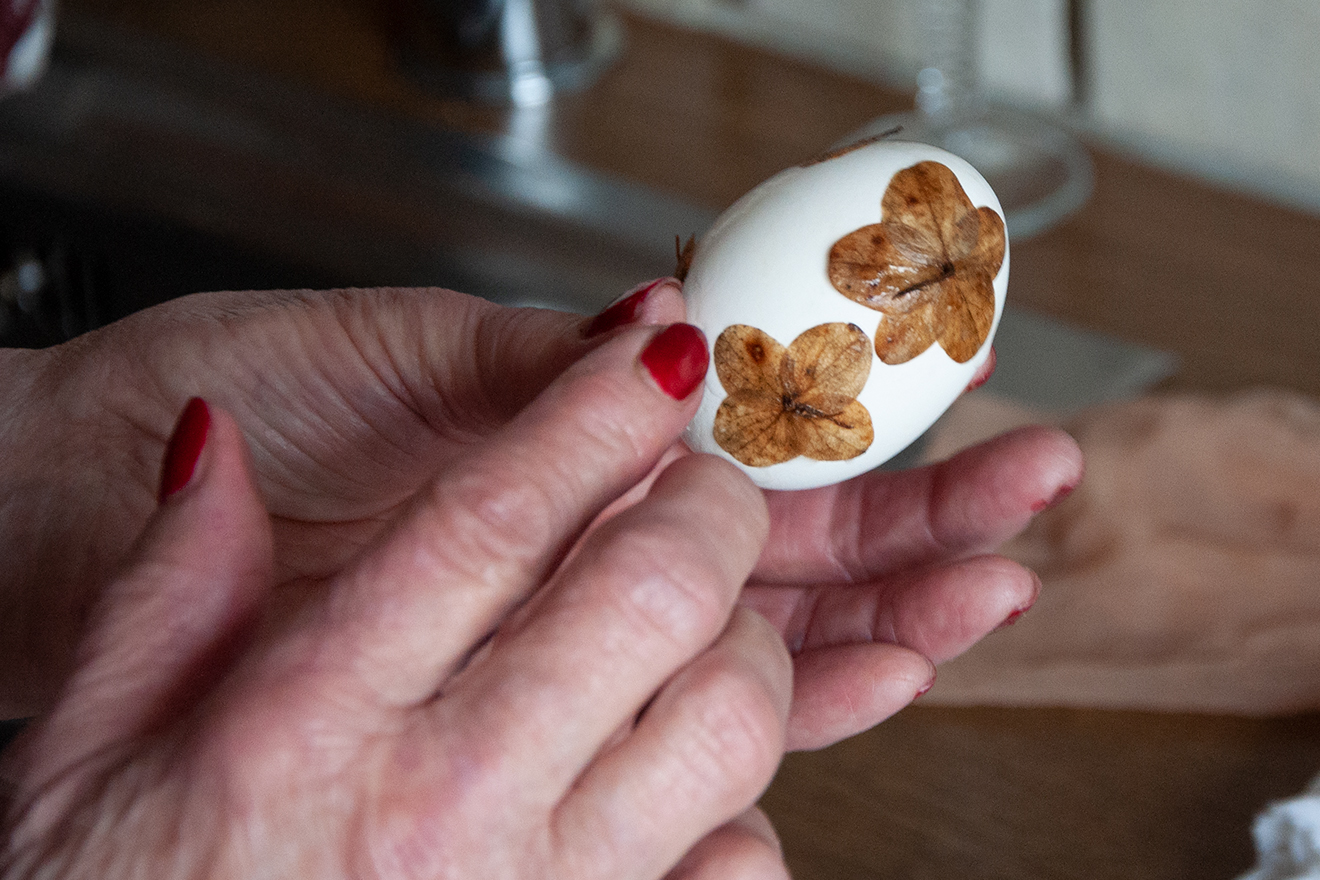
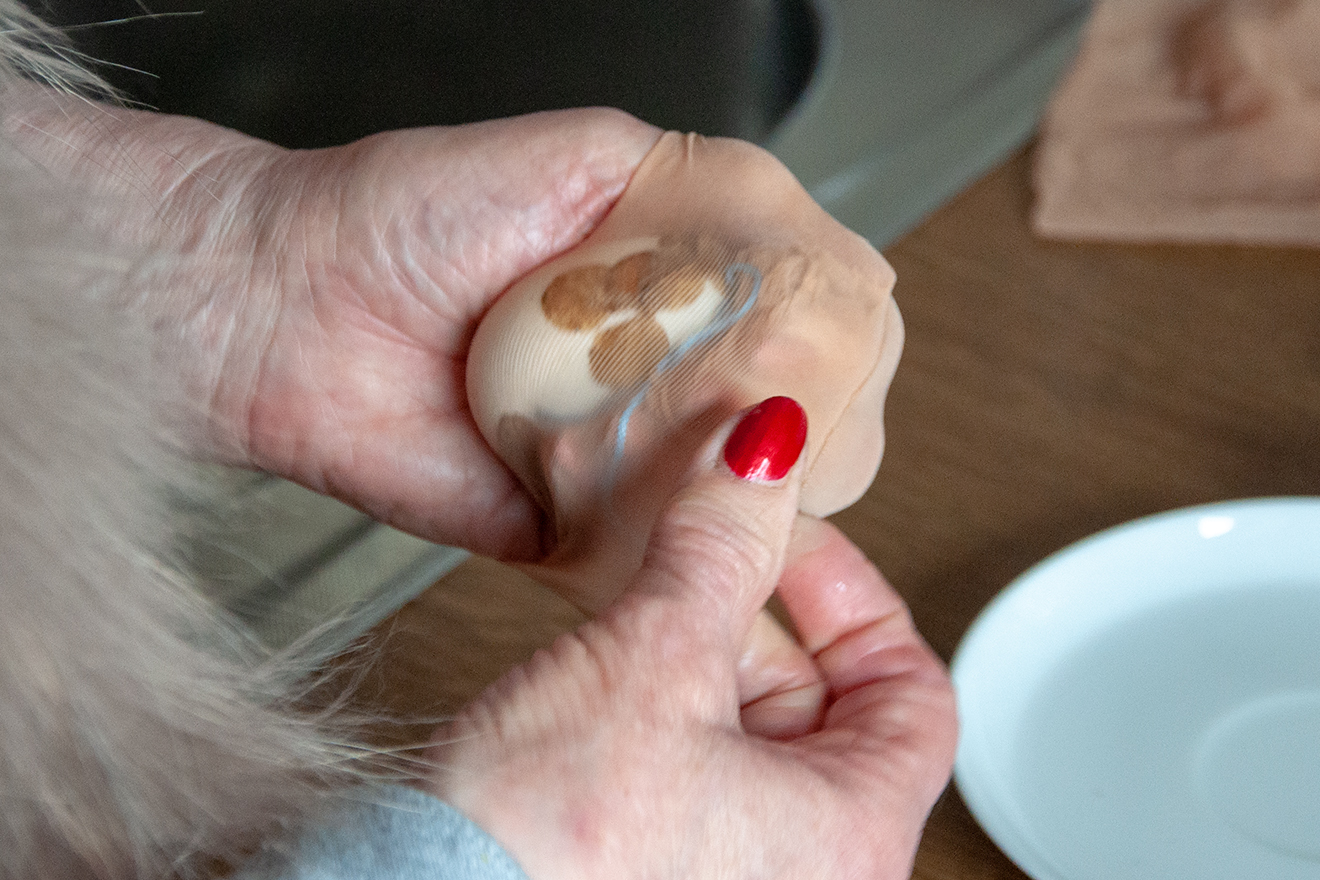
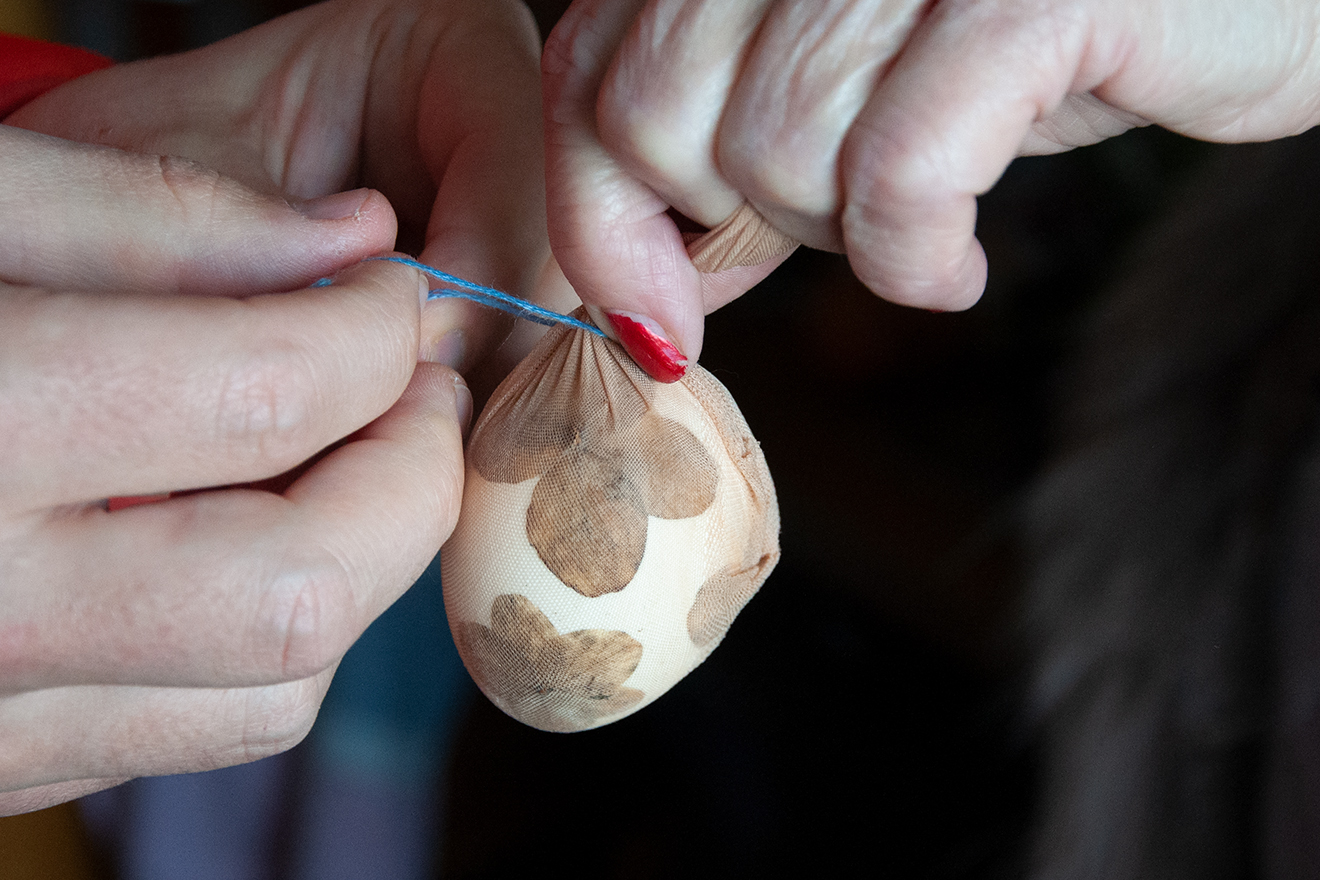
Using dried leaves (for example, parsley or flowers), you can also easily make patterns. For this additionally you will need thin stockings and twine. Wet leaves are placed on the warm and damp egg as desired – the moisture makes them stick to the shell. The next step is a bit tricky, because now the stocking must be pulled over the egg and tied tightly at both ends without shifting the pattern. “A second pair of hands is quite helpful here,” laughs Hilde Flack. Once the stocking is in place, the egg can be carefully placed back into the paint jar. The next steps are the same as for the “simple” egg: Once the stocking is gone (note: please use only once), it is briefly rinsed, dried and rubbed with bacon.
<style type="text/css">
#gallery-1 {
margin: auto;
}
#gallery-1 .gallery-item {
float: left;
margin-top: 10px;
text-align: center;
width: 33%;
}
#gallery-1 img {
border: 2px solid #cfcfcf;
}
#gallery-1 .gallery-caption {
margin-left: 0;
}
/* see gallery_shortcode() in wp-includes/media.php */
</style>
Pure nature
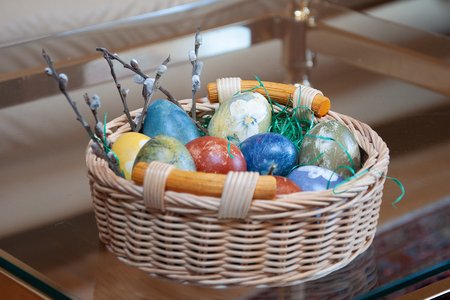
There is no limit to one’s creativity when colouring eggs. “I also experiment a lot,” says the expert, “with the colours and the design.” For example, batik eggs can also be coloured with different stripes or the eggs can be placed one after the other in several colored jars – by the way, do not wash them off in between. Depending on the nature of the shell, it is later speckled or completely recoloured. “Many of the final results surprise even me again and again,” Hilde Flack smiles, “it’s just nature and you can’t predict it.” Nature, by the way, also leaves its mark on fingers. Stubborn paint stains are easily removed with lemon juice.
Ein Osterkorb voll mit bunten Eiern
Bunte Eier gehören in Kitzbühel zu Ostern wie der Christbaum zu Weihnachten. Aber wie kam es eigentlich zu diesem weit verbreiteten Brauch? „Seit jeher gelten Eier als Symbol der Fruchtbarkeit, schon im alten Griechenland wurden sie rot gefärbt“, erzählt Hilde Flack, Expertin für Osterbräuche und das natürliche Färben. „Früher wurde die Fastenzeit zwischen Aschermittwoch und Ostern deutlich strenger eingehalten und auf Eier verzichtet“, schildert die traditionsbewusste Frohnatur weiter.
Die Hühner ließen sich während dieser Zeit natürlich nicht von ihrer täglichen „Arbeit“ abhalten und so sammelten sich viele Eier an. Wurden die Eier zunächst an die Lehnsherren oder Bedürftige abgegeben, entwickelte sich etwa im 16. Jahrhundert der Brauch, verzierte oder bunte Eier zu verschenken. Gearbeitet wurde damals mit Farben, die die Natur geliefert hat. Hilde Flack hat uns verraten, wie Ostereier auch heute ganz natürlich mit Zutaten von Kitzbüheler Landwirten gestaltet werden können.
Ostereier färben - kurz und bündig
- Freilandeier mit Essigwasser abwaschen und hart kochen
- für die Naturfarben eigenen sich u.a. Zwiebelschalen, Spinatblätter, Petersilie, Kurkuma, Mate-Tee, rote Rüben, Heidelbeeren, etc. – alles frisch
- die Rohstoffe zerkleinern und gut 30 Minuten in reichlich Wasser kochen lassen, abseihen, auskühlen und einzeln abfüllen
- die gekochten Eier nochmal mit heißem Wasser übergießen
- nach Wunsch mit getrockneten angefeuchteten Blüten oder Blättern verzieren
- einen dünnen Strumpf vorsichtig über das Ei ziehen und an beiden Enden straff zubinden
- das Ei für mindestens fünf Minuten vorsichtig in das Farbglas legen, dann wenden
- ist das gewünschte Farbergebnis erreicht, Strumpf abschneiden, mit Wasser abspülen und trocken tupfen
- das bunte Ei mit einer Speckschwarte einreiben und ins Osterkörbchen legen
- mit Zitronensaft etwaige Farbreste von den Fingern reiben